
I have fond memories of playing with paper dolls as a young girl. There was something about them that was so captivating, so when a paper doll swap was introduced in a class I am taking, I jumped at the chance. Our swap members are from all over the world which just adds to the fun and excitement of the whole thing. Our class has a mermaid theme, so we decided to make mermaids, but you can make fairies, or even regular dolls. Here are the links to the patterns for the dolls and the mermaids and fairies. They are a fun project and make sweet gifts for the little (or big) girls in your life.
You can make these with lots of different types of supplies and use whatever you might have on hand, so don’t feel like you HAVE to use what I did, but I will tell you how I made them 🙂
You will need:
white watercolor paper or cardstock (just be sure it’s smooth paper)
a copy of the patterns (from the links above) printed out
graphite transfer paper (I used pencil rubbing on the back for this)
paint or markers or whatever you choose to color them with
bleed proof pen–I used Jane Davenport‘s Epic pen-the best pen ever!
small scissors or cutting knife (I use this one)
an awl or pointed object to pierce heavy paper
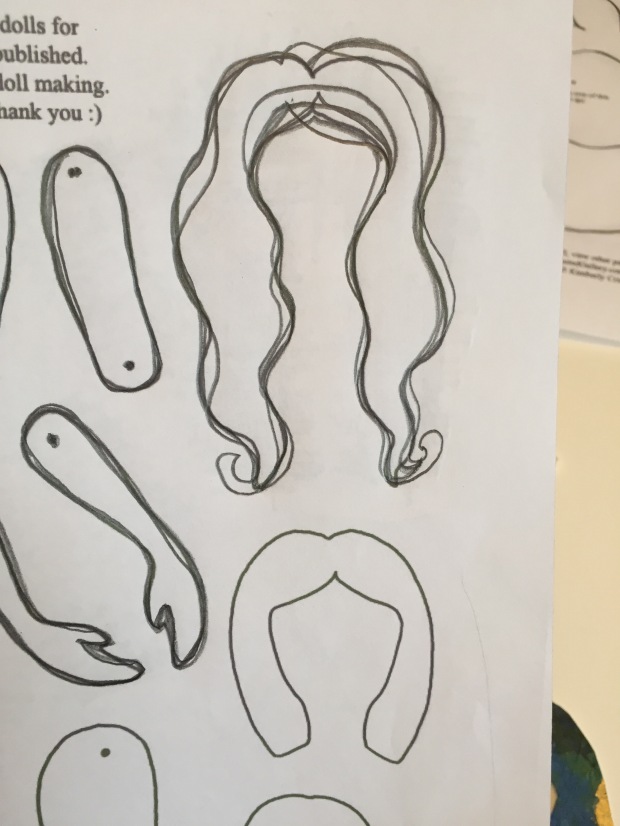
The first step is to print a copy of the pattern you want to use. Then choose which pieces you want to make up your doll. Now it’s time to trace your pattern onto your heavy blank paper.
Once you’ve chosen the pieces you want to use to make up your doll, flip the pattern page over and rub a pencil over the outline on the back side of your chosen pieces. Make sure to do this to EACH part of your doll (the head, upper arms, lower arms, body, and tail).

Turn your pattern back over (facing up) and lay it on top of your heavy paper or cardstock. I recommend taping the sheets together at the top to prevent slipping as you trace your design onto your white paper. Be sure to press firmly as you trace your body parts so that the transfer is dark enough to see. You can also use this transfer paper.
Once you have your pattern traced, I recommend drawing the features on the face and painting BEFORE cutting them out. It is much easier to paint on a larger surface than trying to create small details on tiny pieces. Be sure to use a bleed proof pen when creating facial features so they don’t smear when you add color with paint or markers.
Be sure your paint is DRY before cutting out your pieces. I have made the mistake of trying to cut prematurely and it almost ruined one of my pieces. Did I mention I’m impatient? Fortunately, watercolor is pretty forgiving and I was able to save the piece. It’s not perfect, but I’m okay with that. It’s art, right? I honestly love to see the hand of the artist in handmade things. It’s the tiny imperfections of handmade items that give them charm and beauty. Be okay with imperfect–really–you will be happier and the people around you will be happier.
Once you are SURE it’s dry cut the pieces out. This is probably the most time consuming part. I use this amazing little finger cutter that works really well. If you use this guy, be sure you use a cutting mat or thick cardboard under your project as you cut.
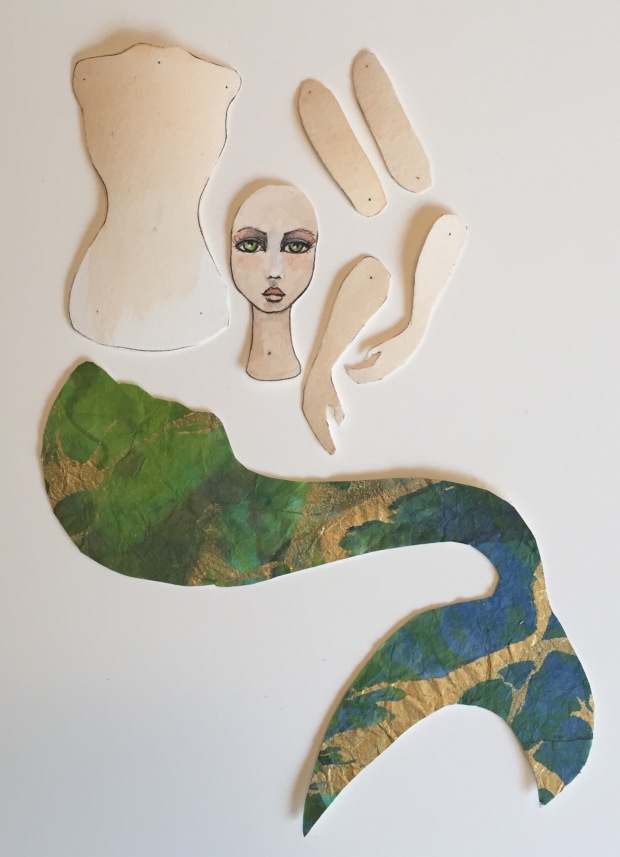
To assemble your doll, line up the pieces where you want them to join and use your awl to poke a hole through BOTH pieces.
Push a brad through each joint to secure them.

Have fun embellishing your doll, you can give it jewelry, a pet, or even a party hat 🙂

Enjoy your new doll–these make a sweet gift, too!

Pretty! I love your creations!
LikeLike